
This topic explains how to install the DI Scoring Program on a computer running a Microsoft Windows operating system.
1. Select Regular or Green Installation
Before you install the DI Scoring Program on each computer, decide whether you want to use a regular or green installation of the DI Scoring Program.
- The regular installation requires that the current user is a member of the Administrator’s group on the computer. It adds the program and files to the hard drive and changes the Windows registry. It puts shortcuts on the desktop and in the Start menu, if requested, and it adds an Uninstall program.
- The green or “leave no trace” installation is designed for borrowed computers where you might not have permission to install programs, change the registry, or access more than one or two directories. You can also use it to keep the program and all related files on external media, such as an external drive or USB jump drive.
This green version installs and runs the DI Scoring Program in a location that you specify, and keeps all of its files in the same location. It does not add anything to the computer’s operating system registry or to any other location. However, if you use this version to install the program to removable media, the media must be in, attached to, or available to the computer whenever you use the DI Scoring Program.
The green version of the DI Scoring Program is available only for Windows computers. There is no green version of the installation program for Macintosh computers, because the Macintosh operating system does not require special permissions to install programs.
2. Get the Installation Program
You can get the DI Scoring Program installation program on the Web or on a CD from your regional director or affiliate director.
To get the program on the Web, go to the DI Scoring Program Web Page (http://discoring.texasdi.org).
3. Select an Installation Program
Select the version of the program that is compatible with the computer’s operating system. There are separate installation programs for Macs and PCs. The installation programs and instructions can always be found at http://discoring.texasdi.org/.
4. Download and Start the Installation Program
Use any of the following methods to start the installation program.
- From the CD, double-click an .exe file to start the installation program.
- On the Web, click the Web link to start the download. Click Run option to start the installation program. Or, click Save option to save the installation program to a drive and then double-click the installation program file to start it.
For a green installation, click Save and then save the installation program to selected location so you know exactly where it is. (The Run alternative stores the installation program in a temporary folder on the system drive.) You can delete the installation program as soon as the installation is complete.
5a. Perform a Regular Installation
The installation program is a series of pages that guide you through the installation and let you select options.
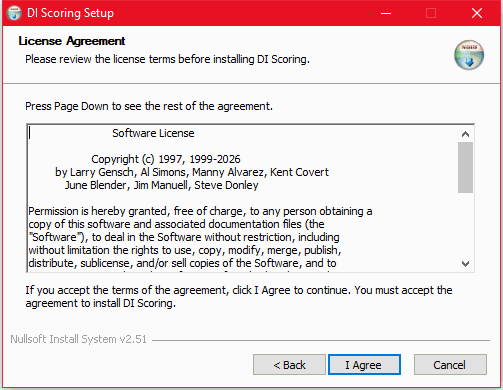
First you must accept the License Agreement:
Then select the install location. As you can see on the page below, the Regular Installation default will create (if needed) a folder named DI Programs in your computer’s root directory. Within that folder, it will create a folder named Scoring Program 2026. If you feel you must locate the program elsewhere, you may Browse to select another location – but remember, this is the recommended Default location:
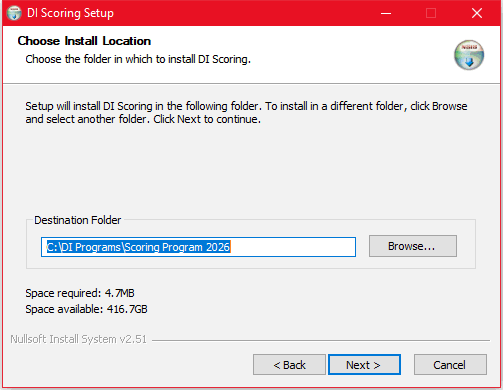
To accept the default settings, always click the Next button at the bottom of each page.
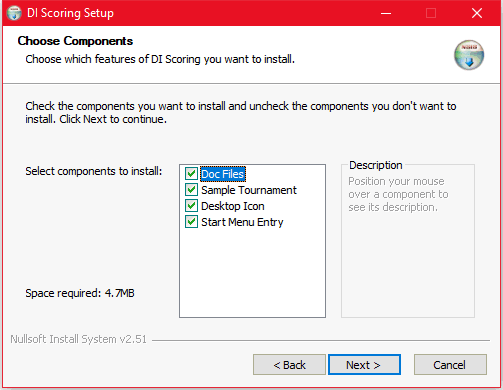
Then Choose from a selection of Components those ones you wish to have installed with the DI Scoring Program. The recommended Default is to select all four of these.
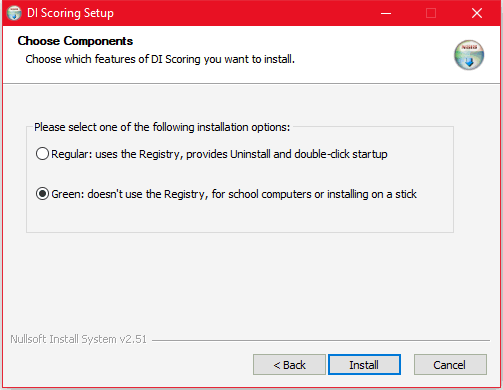
On the Regular or Green page, select Regular.
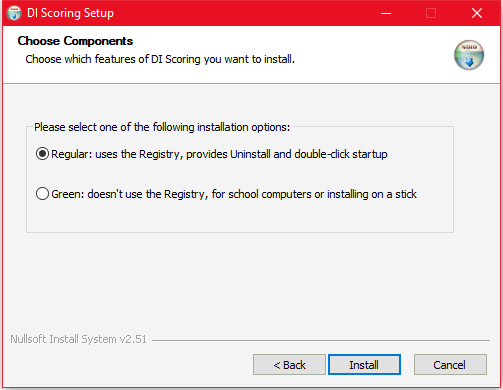
Click the Install button.
The regular installation is now complete and you’re ready for the next step: Start the Scoring Program.
– or –
5b. Perform a Green Installation
When you perform a green installation, you install the DI Scoring Program in a specific directory, on the desktop, on a network share, or on removable media, such as an external drive, or a USB jump drive. We’ll refer to this location as your green location.
- Insert or attach the removable media, if necessary. You’ll need approximately 107 MB of free space for the installation and the tournament files.
- To start the installation program, navigate to the green location where you saved it, and double-click the .exe file.
- On the Choose Install Location page, click Browse and navigate to the green location.
For example, if the green location is on the D: drive of your computer, navigate to the D: drive or to a folder or subfolder on the D: drive click OK.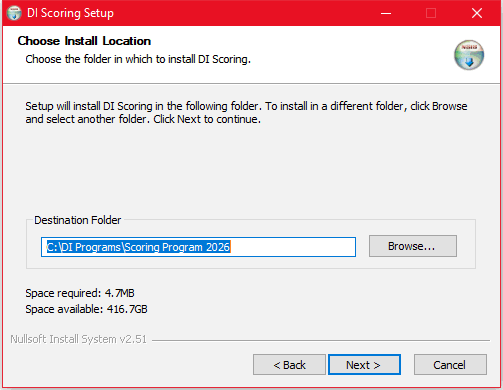
- On the Choose Components page, click Next (accept the default values).
- On the Regular or Green page, select Green.
- When the installation completes, go to the green location, double-click the DI Scoring <year> installation directory to open it, and then double-click the DoubleClickToCreateDesktopIcon.vbs file.
This script adds a special green desktop shortcut to the computer desktop. When you use this special shortcut, it starts the program as usual, but it also places your Preferences file in the green location instead of the default %USERPROFILE% location.
| Note |
|---|
| If you have installed the DI Scoring Program on removable media, and you are using the media on different computers, create a green desktop shortcut on every computer that you use, and use the green desktop shortcut every time you start the program. This ensures that the Preferences file is installed in the correct location and is available on every computer that you use. |
- When you’re ready to uninstall the program, follow the special instructions: Undoing the Green Installation.
When the installation is complete, you can delete the installation program. This does not prevent you from running or uninstalling the DI Scoring Program.
Now you’re ready for the next step: Start the Scoring Program.